Configuring Your Looker Connector to DataHub
Now that you have created a DataHub specific API key with the relevant access in the prior step, it's now time to set up a connection via the DataHub UI.
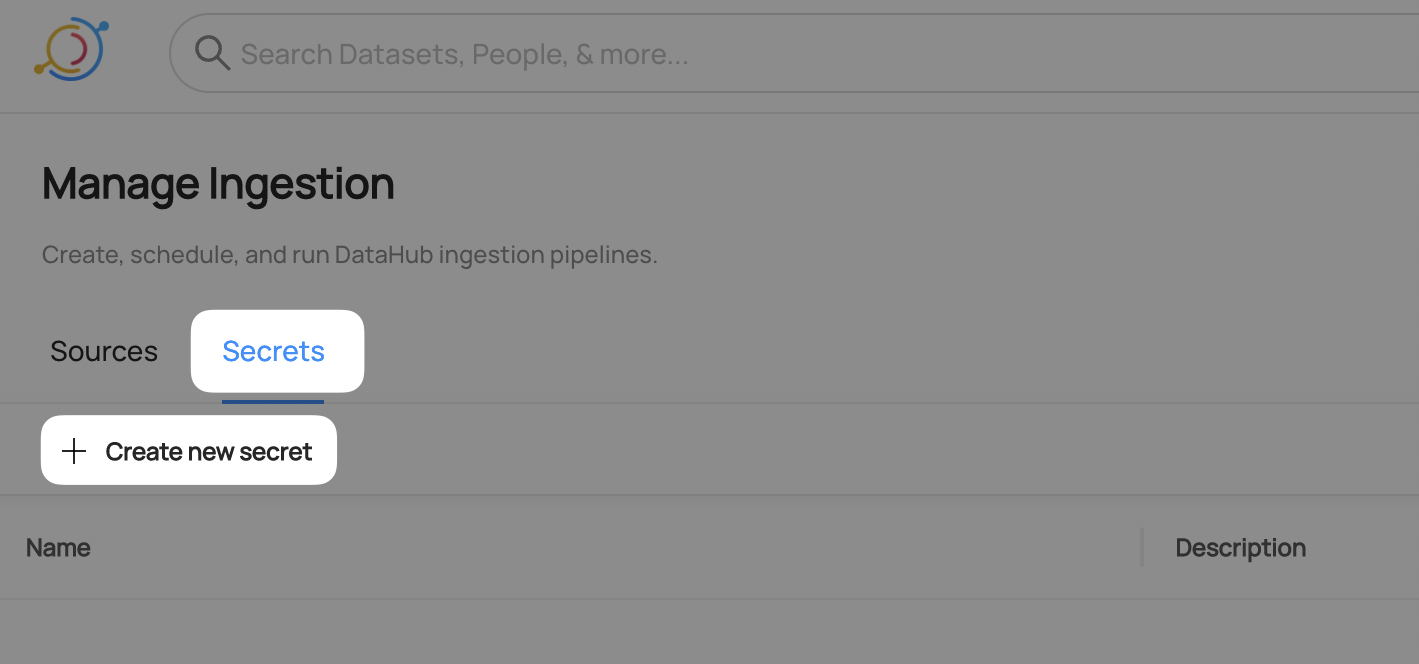
Configure Secrets
- Within DataHub, navigate to the Ingestion tab in the top, right corner of your screen

If you do not see the Ingestion tab, please contact your DataHub admin to grant you the correct permissions
- Navigate to the Secrets tab and click Create new secret.
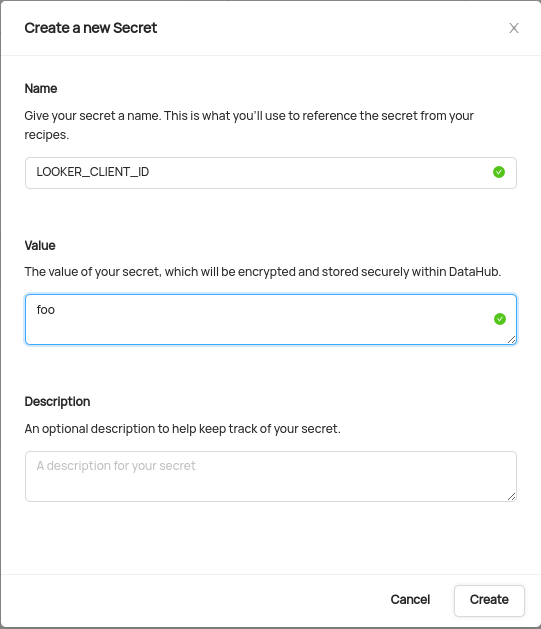
Create a client id secret
This will securely store your Looker
API Key Client IDwithin DataHub- Enter a name like
LOOKER_CLIENT_ID- we will use this later to refer to theAPI Key Client ID - Enter the
API Key Client ID - Optionally add a description
- Click Create
- Enter a name like
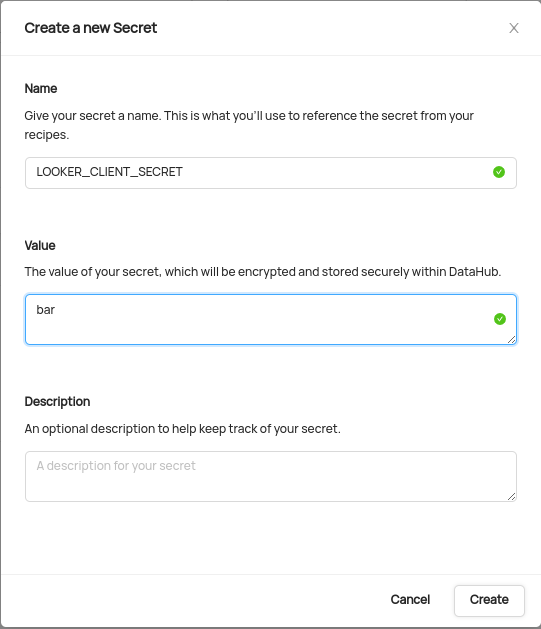
Create a secret to store the API Key Client Secret
This will securely store your client secret"
- Enter a name like
LOOKER_CLIENT_SECRET- we will use this later to refer to the client secret - Enter the client secret
- Optionally add a description
- Click Create
- Enter a name like
Configure Recipe
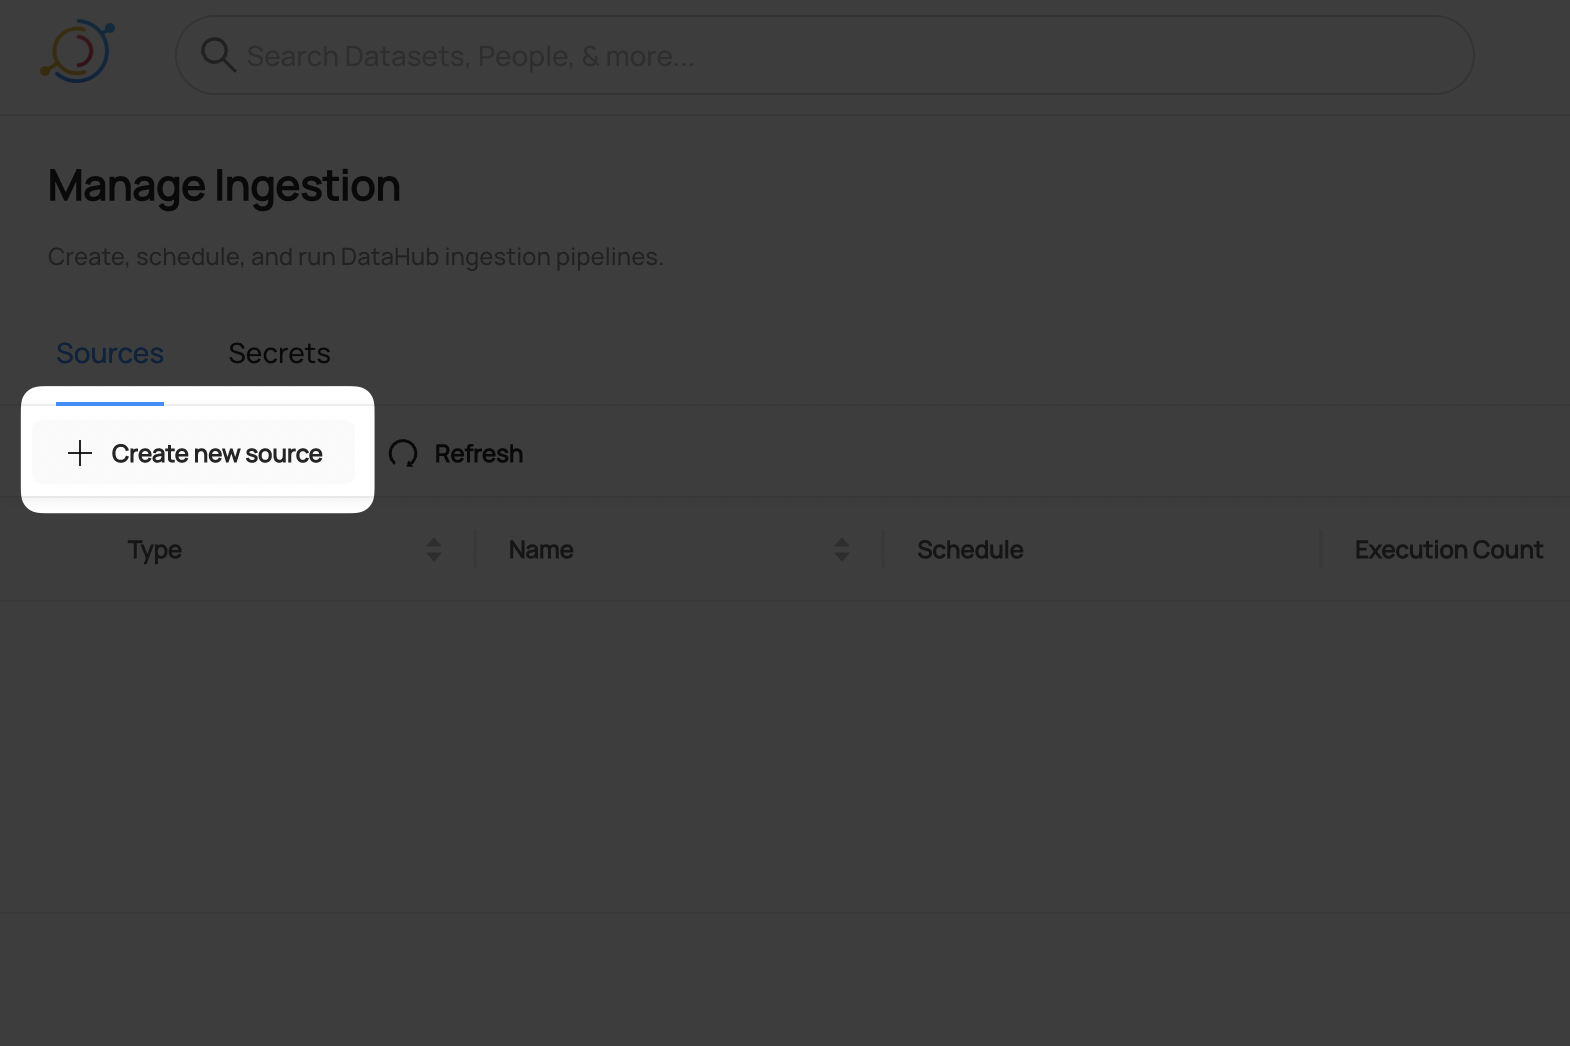
Navigate to the Sources tab and click Create new source
Choose Looker

Enter details into the Looker Recipe
You need to set minimum 3 field in the recipe:
a. Base URL: This is your looker instance URL. For example https://abc.cloud.looker.com.
b. Client ID: Use the secret LOOKER_CLIENT_ID with the format
${LOOKER_CLIENT_ID}.c. Client Secret: Use the secret LOOKER_CLIENT_SECRET with the format
${LOOKER_CLIENT_SECRET}.
Optionally, use the dashboard_pattern and chart_pattern fields to filter for specific dashboard and chart.
config:
     ...
     dashboard_pattern:
        allow:
          - "2"
     chart_pattern:
        allow:
          - "258829b1-82b1-4bdb-b9fb-6722c718bbd3"
Your recipe should look something like this:
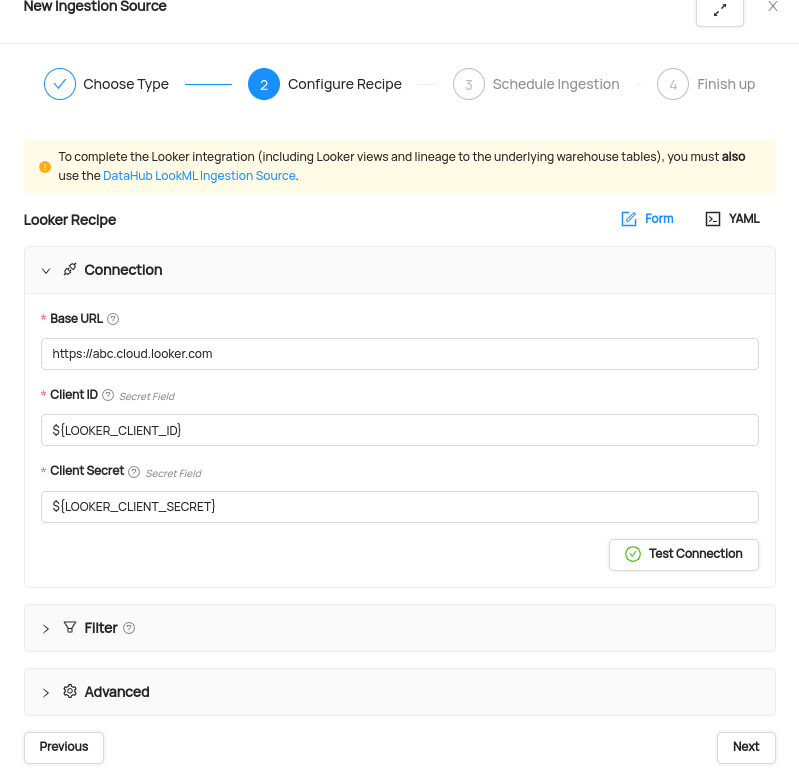
After completing the recipe, click Next.
Schedule Execution
Now it's time to schedule a recurring ingestion pipeline to regularly extract metadata from your Looker instance.
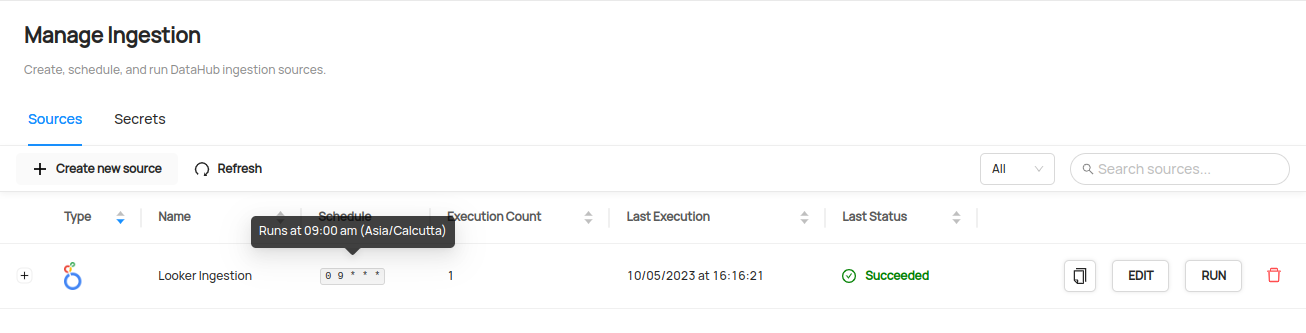
- Decide how regularly you want this ingestion to run-- day, month, year, hour, minute, etc. Select from the dropdown
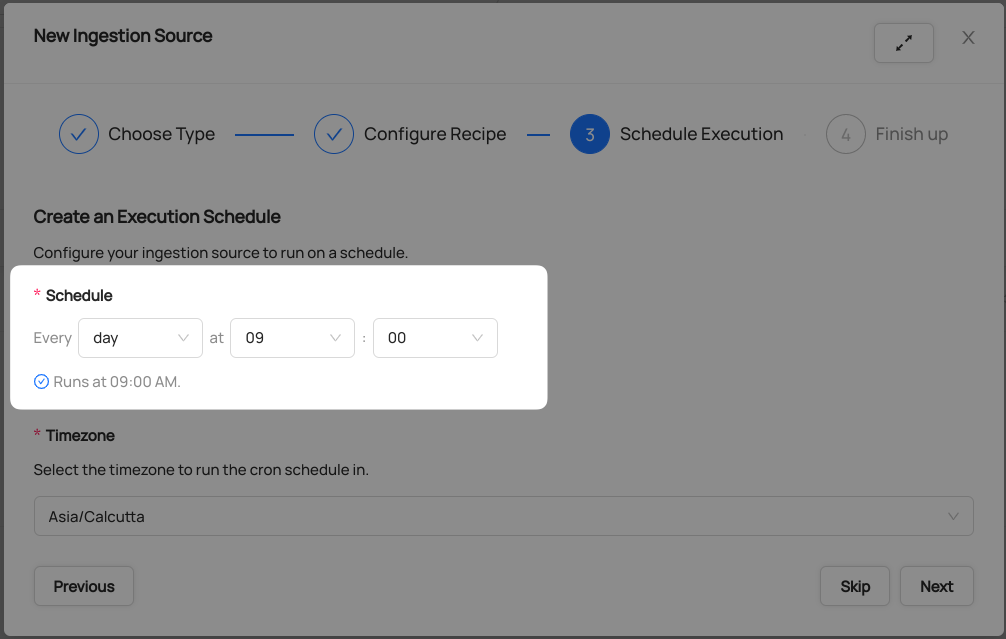
Ensure you've configured your correct timezone
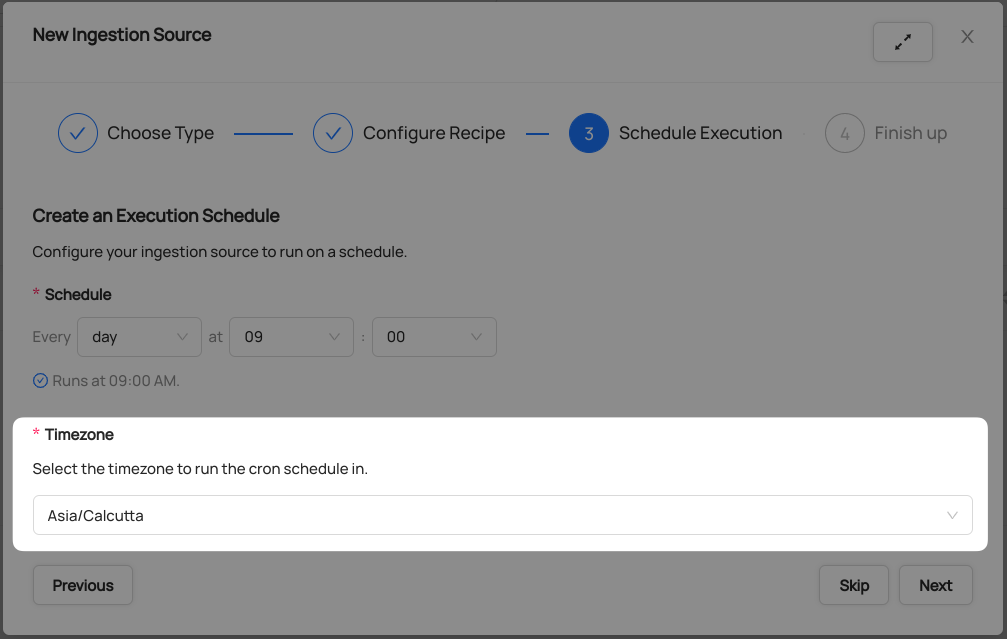
Click Next when you are done
Finish Up
- Name your ingestion source, then click Save and Run
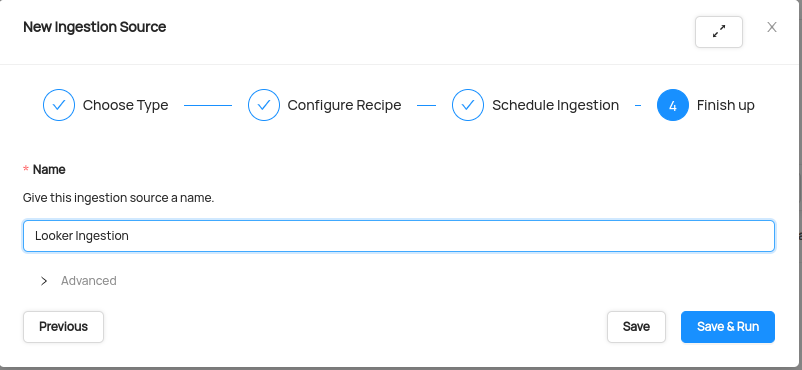
You will now find your new ingestion source running
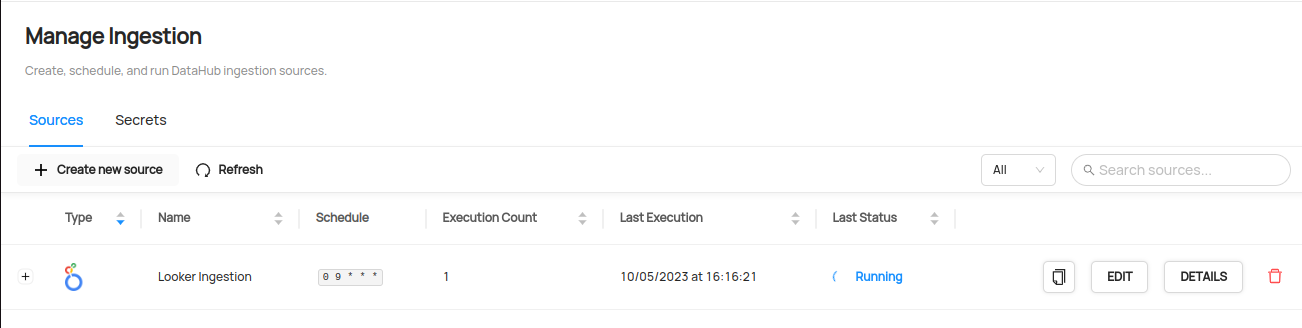
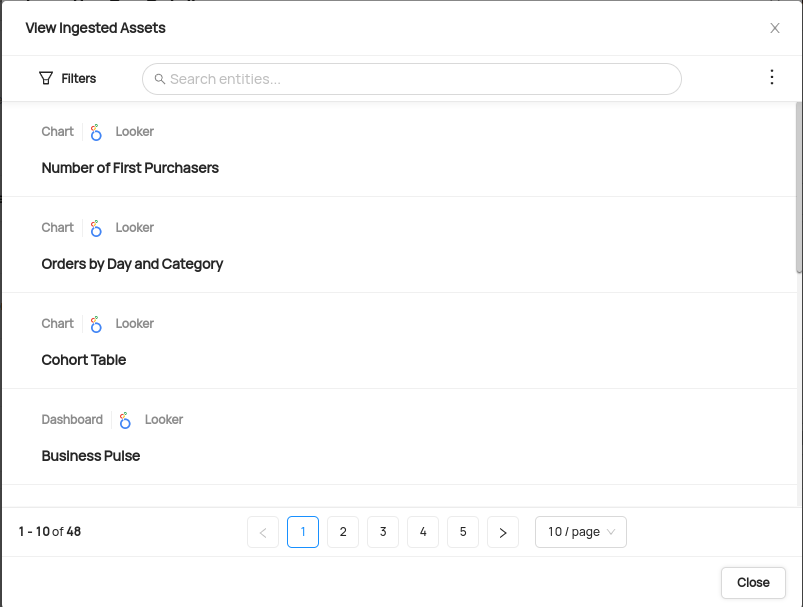
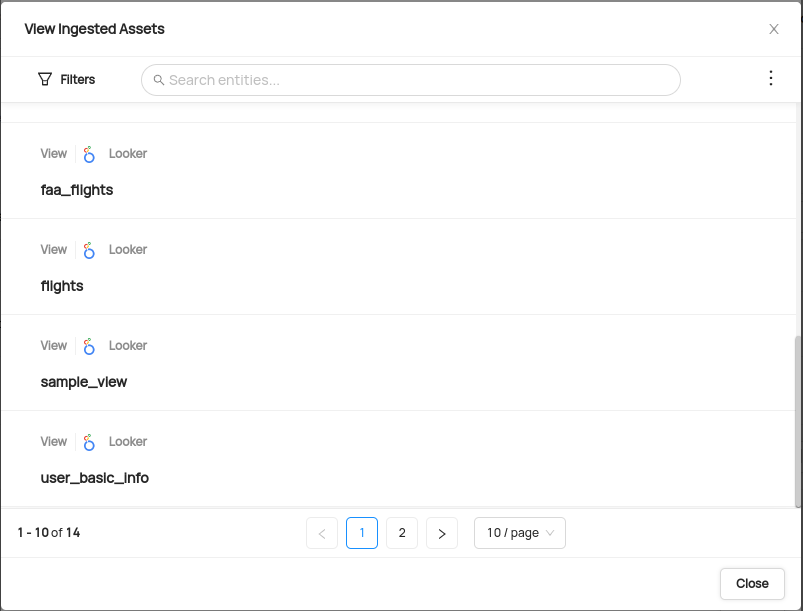
Validate Ingestion Runs
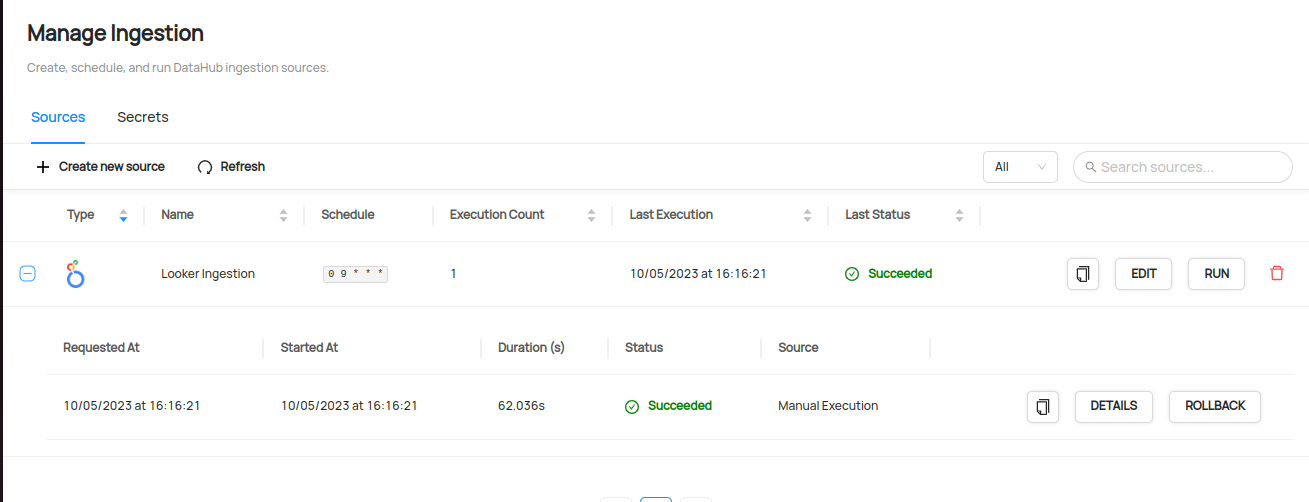
- View the latest status of ingestion runs on the Ingestion page
- Click the plus sign to expand the full list of historical runs and outcomes; click Details to see the outcomes of a specific run
- From the Ingestion Run Details page, pick View All to see which entities were ingested
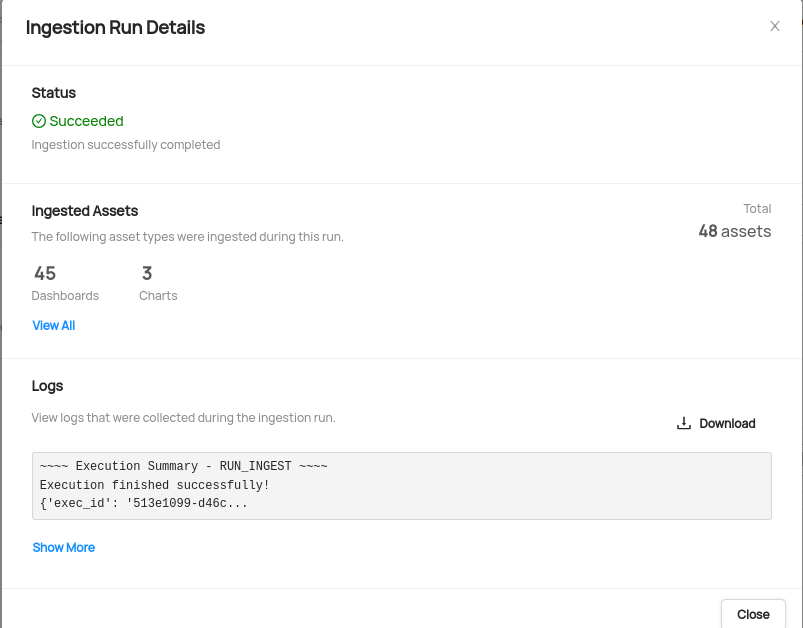
- Pick an entity from the list to manually validate if it contains the detail you expected
Configuring Your LookML Connector to DataHub
Now that you have created a DataHub specific API key and Deploy Key with the relevant access in the prior step, it's now time to set up a connection via the DataHub UI.
Configure Recipe
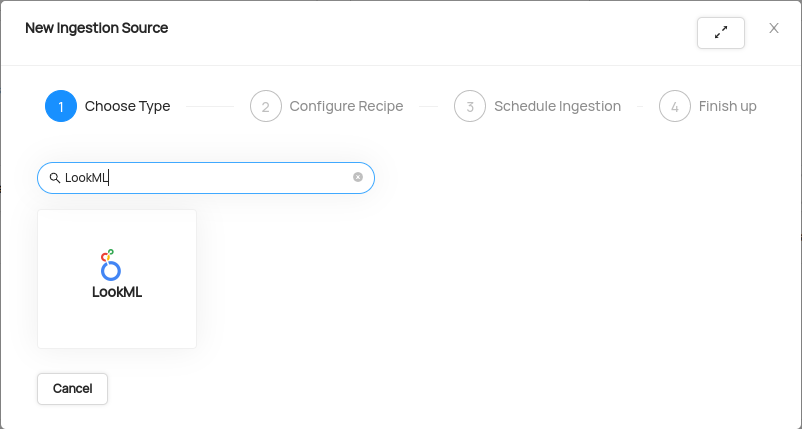
Navigate to the Sources tab and click Create new source
Choose LooML
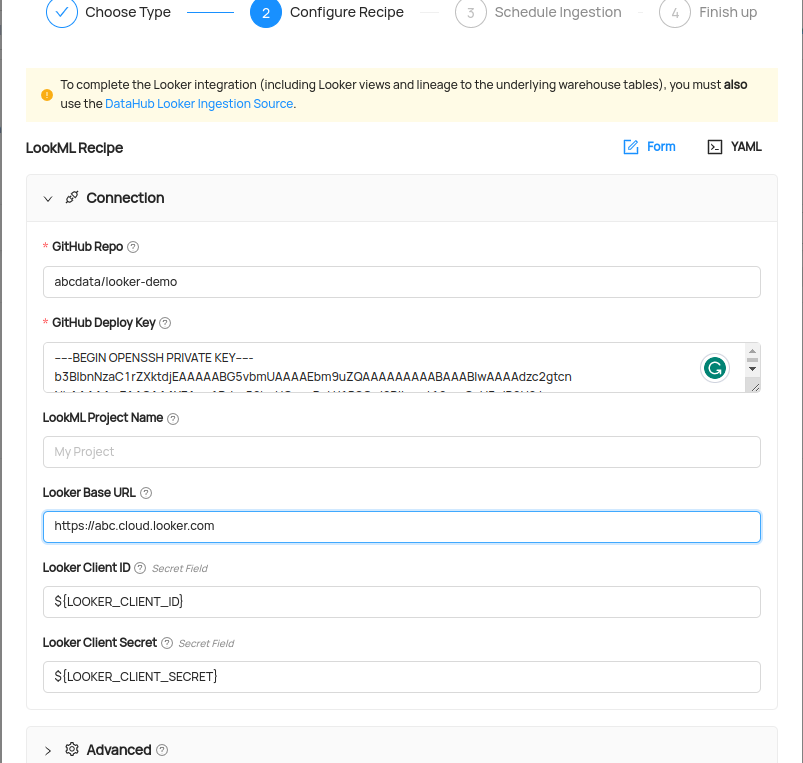
Enter details into the Looker Recipe
You need to set minimum 5 field in the recipe for this quick ingestion guide:
a. GitHub Repo: This is your github repository where LookML model are stored. You can provide full URL (example: https://gitlab.com/gitlab-org/gitlab) or organization/repo in this case connector assume it is GitHub repo
b. GitHub Deploy Key: Copy the content of
looker_datahub_deploy_keyand paste into this filed.c. Looker Base URL: This is your looker instance URL. For example https://abc.cloud.looker.com
d. Looker Client ID: Use the secret LOOKER_CLIENT_ID with the format
${LOOKER_CLIENT_ID}.e. Looker Client Secret: Use the secret LOOKER_CLIENT_SECRET with the format
${LOOKER_CLIENT_SECRET}.
Your recipe should look something like this:
After completing the recipe, click Next.
Schedule Execution
Now it's time to schedule a recurring ingestion pipeline to regularly extract metadata from your Looker instance.
- Decide how regularly you want this ingestion to run-- day, month, year, hour, minute, etc. Select from the dropdown
Ensure you've configured your correct timezone
Click Next when you are done
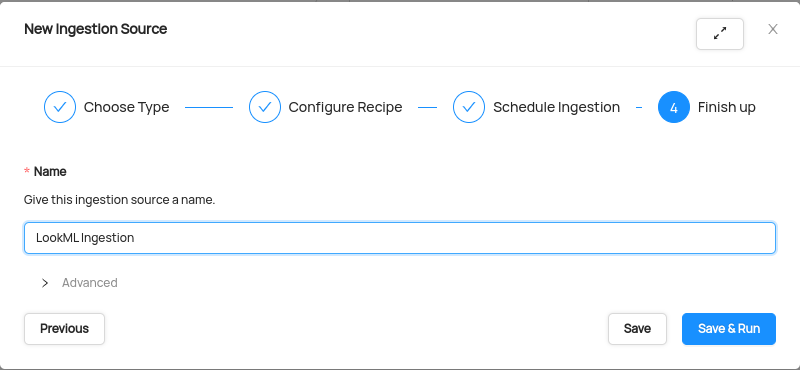
Finish Up
- Name your ingestion source, then click Save and Run
You will now find your new ingestion source running
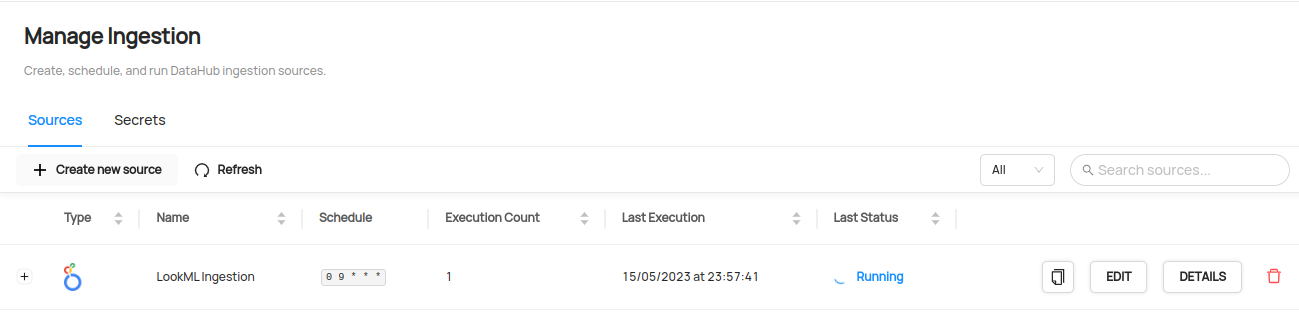
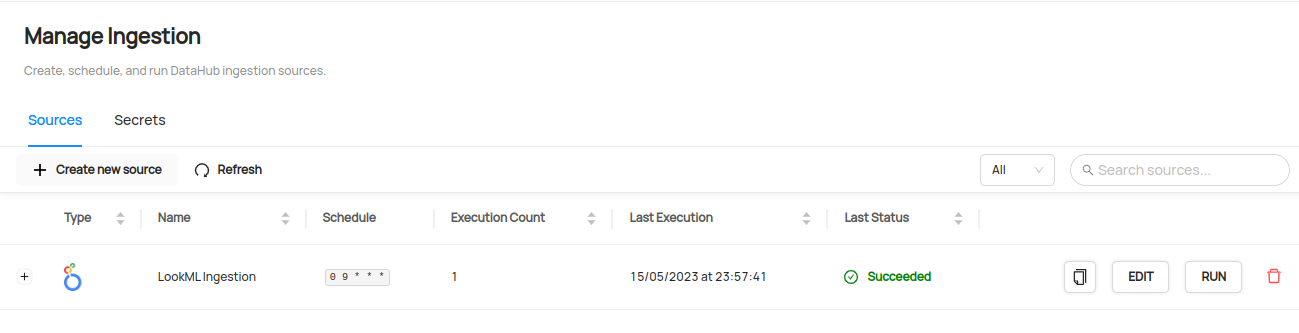
Validate Ingestion Runs
- View the latest status of ingestion runs on the Ingestion page
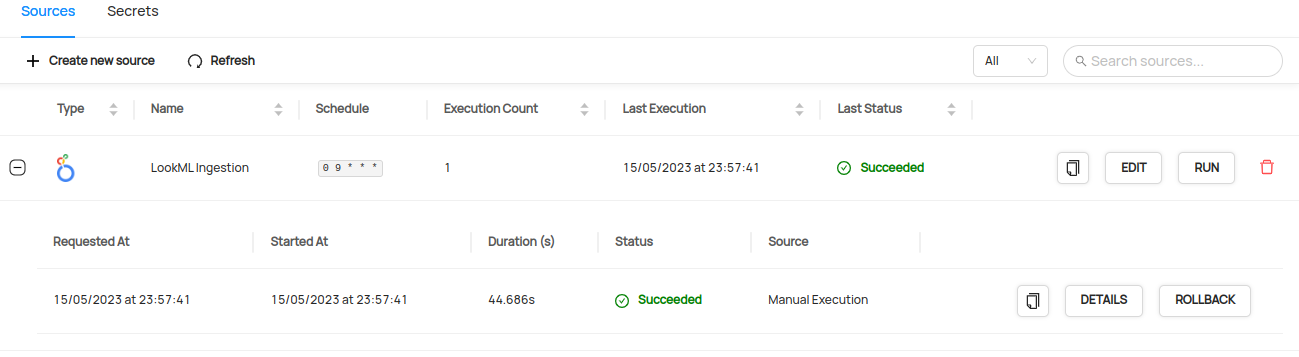
- Click the plus sign to expand the full list of historical runs and outcomes; click Details to see the outcomes of a specific run
- From the Ingestion Run Details page, pick View All to see which entities were ingested
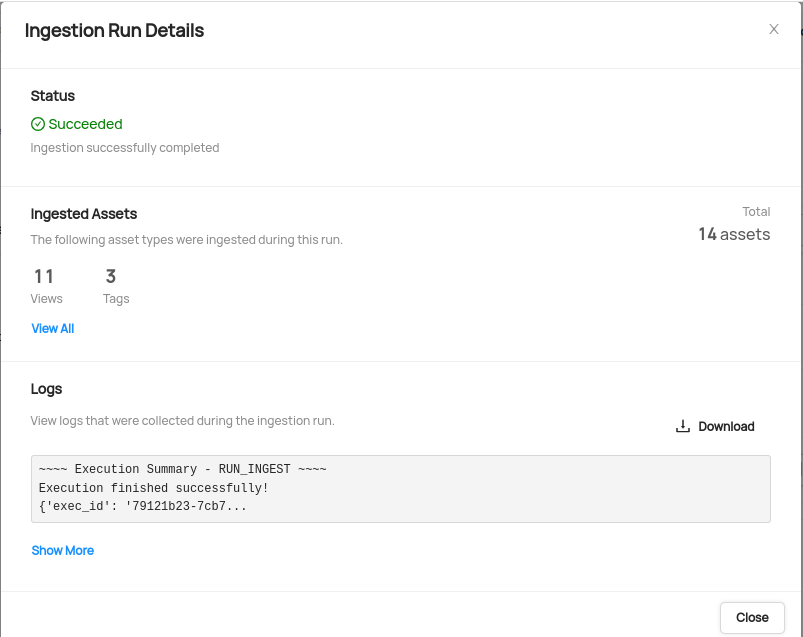
- Pick an entity from the list to manually validate if it contains the detail you expected
Congratulations! You've successfully set up Looker & LookML as an ingestion source for DataHub!
Need more help? Join the conversation in Slack!